- Solutions
- AI First Services
- Business Outcomes
- Industry AI Accelerators
- Insights & Resources
- About
For business management solutions email us or call 020 3004 4600
Have you ever wanted to have an overview of certain General Ledger account balances in Dynamics GP, their respective budgets and variances at your fingertips rather than having to a run a huge report? You can simply achieve this through the Account Rollup Enquiry feature in your Dynamics GP solution. In our latest tips and tricks article, we are going to provide you with a step by step guide on how to use the Account Rollups Enquiry feature in Dynamics GP.
Step 1: Login into your Dynamics GP solution, then from the Financial page, go to 'Enquiry' then 'Financial' and select 'Account Rollup'.
Step 2: Once this window is open, you will need to enter an Option ID to name your new Account Group, which will allow you to use this enquiry again without having to go through the process of setting it up from scratch.
Step 3: Tabbing off the Option ID will provide you with the opportunity to save this option. When you click 'Yes', the Account Rollup Enquiry Options window will launch.
NB: If you already have an existing Option, you can click the Modify button to open this window.

Step 4: From here, you will need to choose the segment to sort by, as this field will determine how the drilldown reports are ordered when printed.
Step 5: The columns field should, by default, read '1'. From here you can choose to add up to four columns in your enquiry.
Step 6: Within the scrolling window, you will see that the Column Heading says Column 1 so you will need to change this to something more suitable to correspond with your type selection.
Step 7: Next you will need to choose your type from the options below:
Step 8: Next you will need to define the range of accounts you will be reporting on.
Step 9: Select 'Enquiry' and save the Option. This will then launch the Account Rollup Enquiry window.
NB: It is important to ensure that when you are prompted to save or delete ALWAYS click Save as changes cannot be deleted.
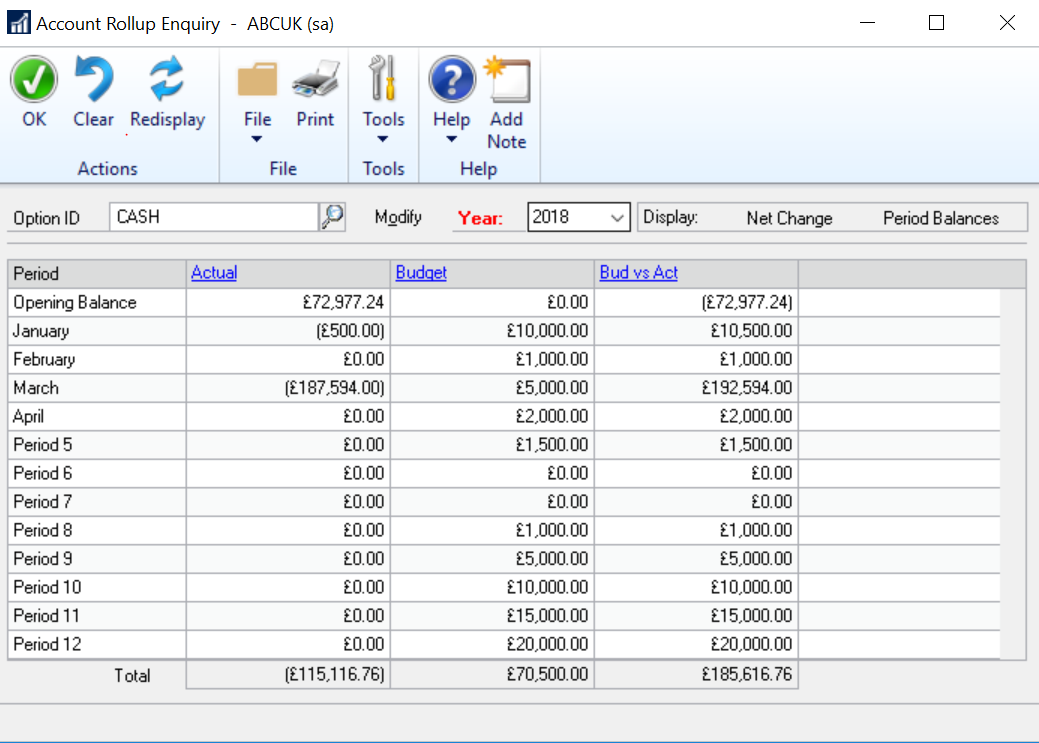
Step 10: You are now ready to use your new Account Rollup. Decide on which year you would like to report on then select 'Redisplay' to view the summary data.
Step 11: Using the radio buttons at the top of the screen, you can choose to view the data as 'Net Change amounts' or 'Period Balance amounts'.
Step 12: From here, select the 'Print' button for a report which will display both net change and period balances. This report can be sent to file as a .csv type and then opened in Excel.
NB: Everytime you make a change to the parameters in either the Account Rollup Enquiry Options window or the Account Rollup Enquiry window, you will need to select 'Redisplay' to confirm the changes.
Step 13: To drill into a period for more account level details, select a period and then pick the blue underlined header links.
Step 14: You are now able to print in either Summary or Detail by clicking on the 'Print' button.
NB: The sorting on these reports is dictated by the 'sort by' option you picked in Step 4.
Step 15: To drill down to journal level detail, choose an account and select the blue underlined 'Balance' link.
Step 16: From here, highlight a Journal Entry and select the blue underlined 'Journal Entry' link which will take you through to the Journal Entry screen.
Step 17: Select the blue underlined 'Source Document' link on the transaction screen to go back to the original transaction entry screen, where you can view the distributions and apply information.
If you are a small or medium sized business struggling to use the features within your Dynamics GP solution or require extra Dynamics GP training or additional Dynamics GP support then get in touch with Advantage today.
Interested in hearing more from us? Then why not sign up to our marketing emails which will provide you with the latest insights, upcoming webinars and events and much more straight into your inbox.
