If you are looking to use your Dynamics 365 solution more effectively for your marketing campaigns, it's very handy to be able to segment your data into specific marketing lists to help better target your overall marketing campaigns.
If you are struggling to be able to do this, no need to worry as in our latest how to guide, we will take you through the process of how to create static marketing lists within Dynamics 365.
Creating Static Marketing Lists

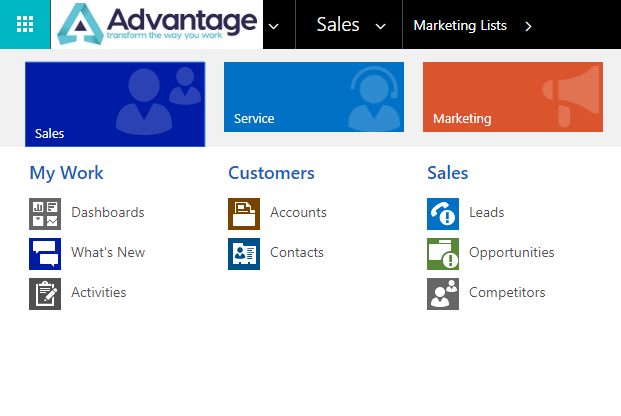
Step 1: On the main Navigation Bar, click on the arrow to the right hand side of the Sales module.
Step 2: Click on 'Marketing', then click on 'Marketing Lists'.
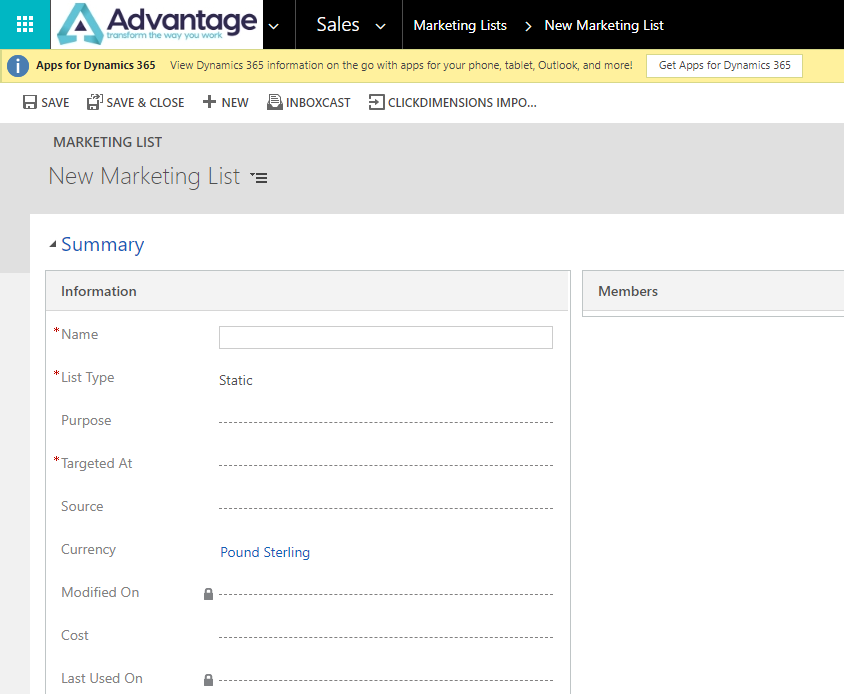
Step 3: Select the 'New' option on the command bar.
Step 4: Select a suitable 'Name'.
Step 5: Select the 'Targeted At' option and choose either 'Account', 'Contact' or 'Lead' (NB - You cannot edit this once saved and you can only add members of the same type within this list after).
Step 6: Select 'Static' in List Type (NB – This cannot be changed after you save this record).
Step 7: Save the record.

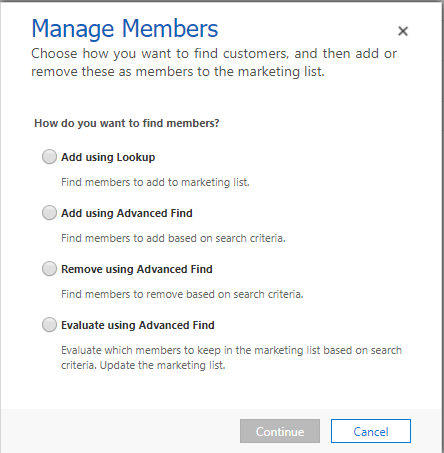
Step 8: Click on 'Manage Members' in the main Navigation Bar.

Step 9: Select to either add or remove members on this list
Step 9a – Select 'Lookup' to individually add members one at a time.
Step 9b – Select 'Advanced Find' to choose members based on a campaign criteria.

How to add members to an existing Static Marketing List
Step 1: On the main Navigation Bar, select 'Sales' and then go to a list of 'Contacts', 'Leads' or 'Accounts'.
Step 2: Tick the box next to the record that you would like to add to the marketing list.
Step 3: Select 'Add to Marketing List'.

Step 4: Select the Marketing list you would like to add to from the options then select 'Add'.
Is your business having trouble getting to grips with Dynamics 365 and requires some additional advice, training or a consultation? Why not get in touch with Advantage today to discuss your requirements with our Dynamics 365 experts to see how we can help your business?


