- Solutions
- AI First Services
- Business Outcomes
- Industry AI Accelerators
- Insights & Resources
- About
For business management solutions email us or call 020 3004 4600
With most businesses operating on a global basis, it is more than likely that there will be occasions where businesses get purchase invoices where different lines may have different VAT rates. This could happen when products are purchased abroad which might not be VAT taxable however the freight itself could require VAT to be paid. This is often referred to as 'VAT Difference' within Dynamics NAV. In our latest tips and tricks article, we will provide you with a step by step guide on how to setup VAT differences for Purchase Invoices and Purchase Orders in Dynamics NAV.
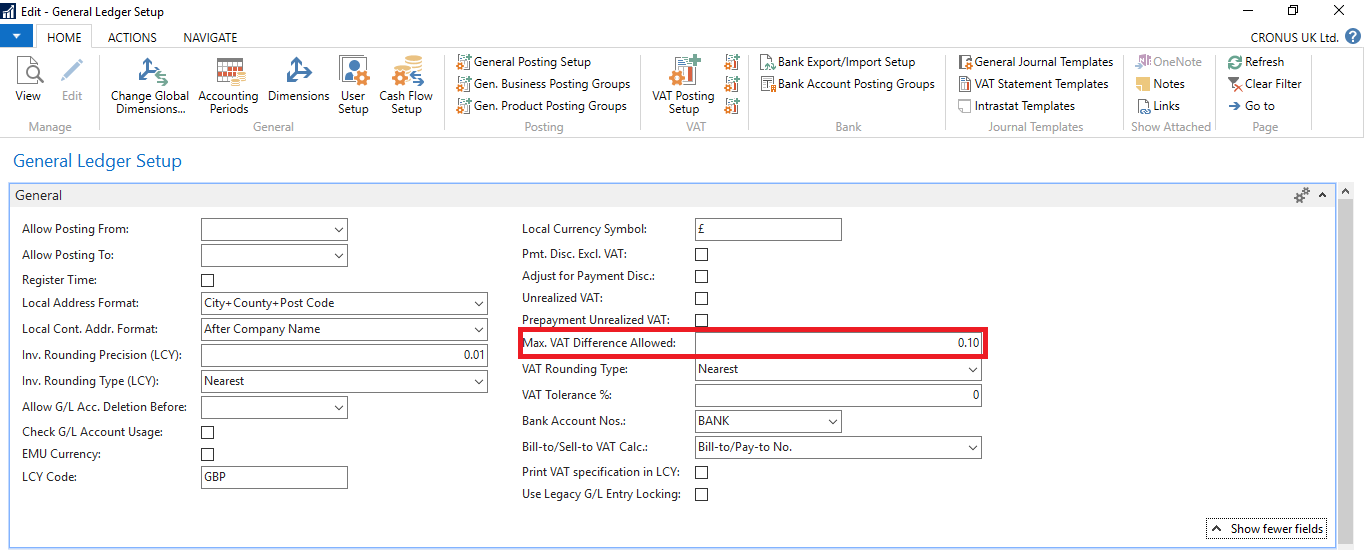
Step 1: To start with you will need to need to access the 'General Ledger Setup'. You can do this by logging into your Dynamics NAV solution, from here go to 'Departments' then 'Financial Management' onto 'Setup' followed by 'Admin' and click 'General Ledger Setup' or you can manually search by typing 'General Ledger Setup' if you wish.
Step 2: On this page, you will need to set a maximum VAT difference that users will be able to enter into the system. This figure will need to be agreed upon internally.
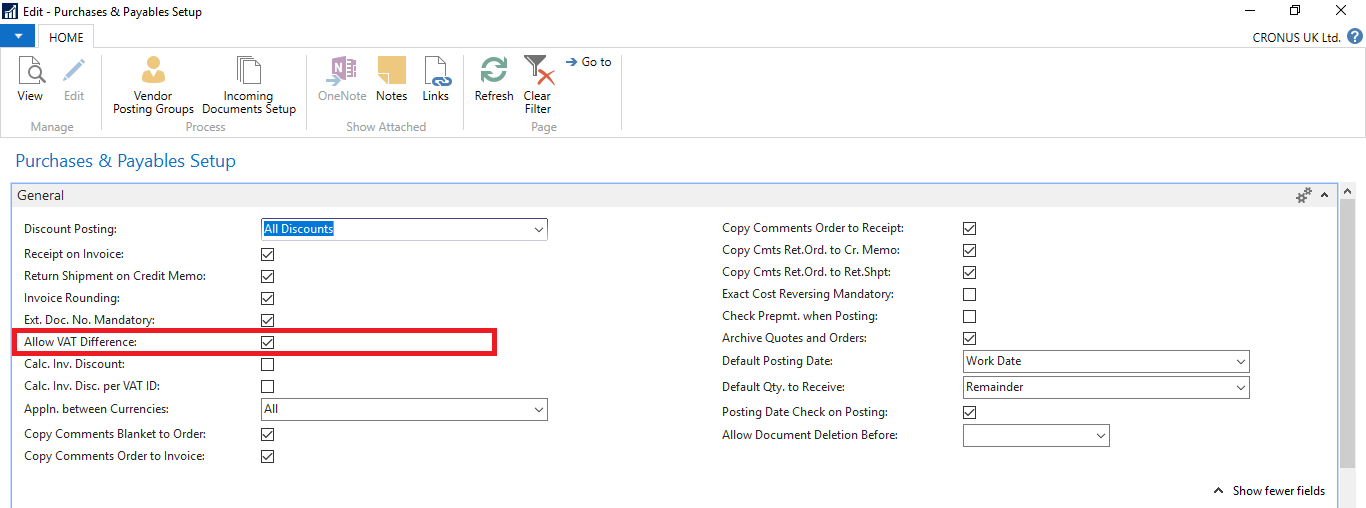
Step 3: Once you have done this, you will then need to setup the Purchases & Payables which you can find by going back to the main navigation and going to 'Departments' then 'Purchasing' followed by 'Setup' then 'Purchases & Payables Setup' or like above manually search for 'Purchases & Payables Setup'. After you get here, you will need to make sure that you tick the box that says 'Allow VAT Difference'.
Step 4: Now that you have completed the above you are now ready to start using the VAT Difference Function for a Purchase Invoice. To do this, select a purchase invoice followed by the 'Statistics' button which is in the ribbon. From here you will need to adjust the VAT amount, users can do this by clicking on the 'VAT Amount' field then making the necessary adjustments.
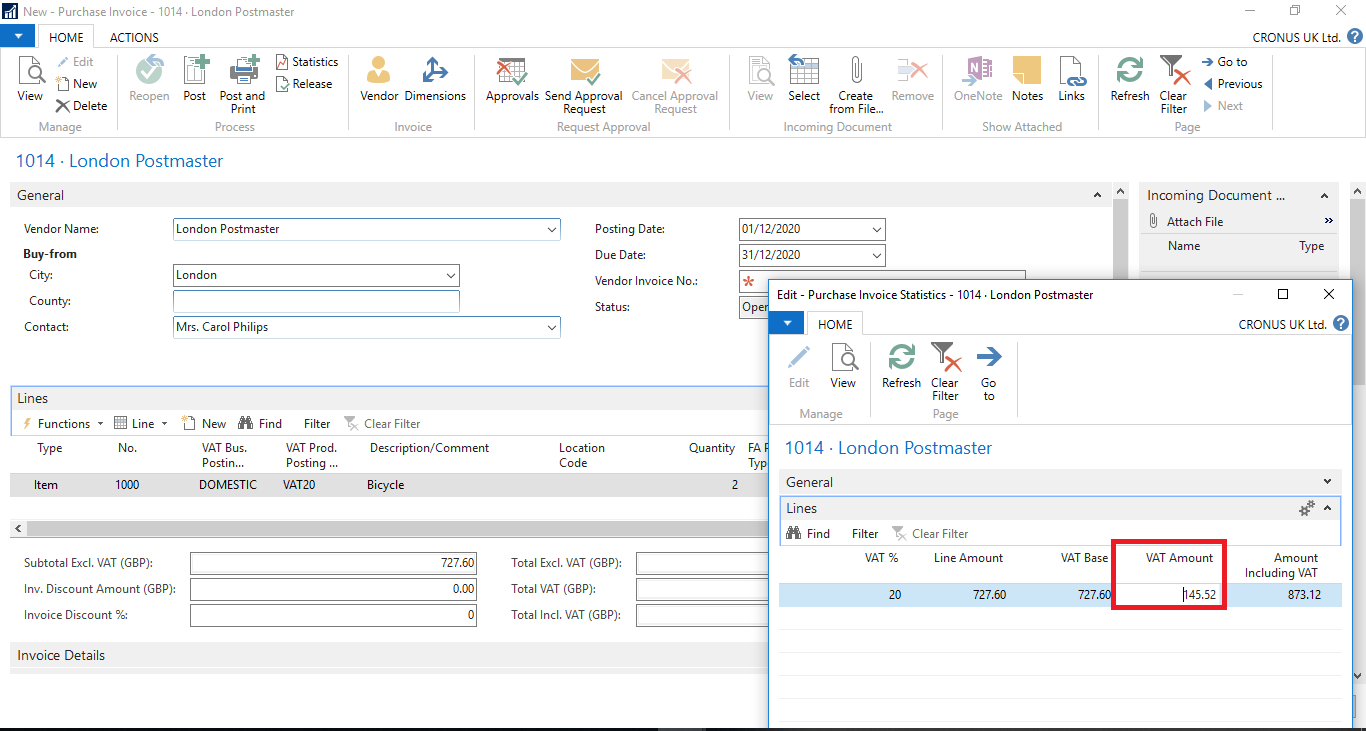
NB: It's important to note that to be able to adjust the VAT on a specific Purchase Order, you will need to release it before you can do it.
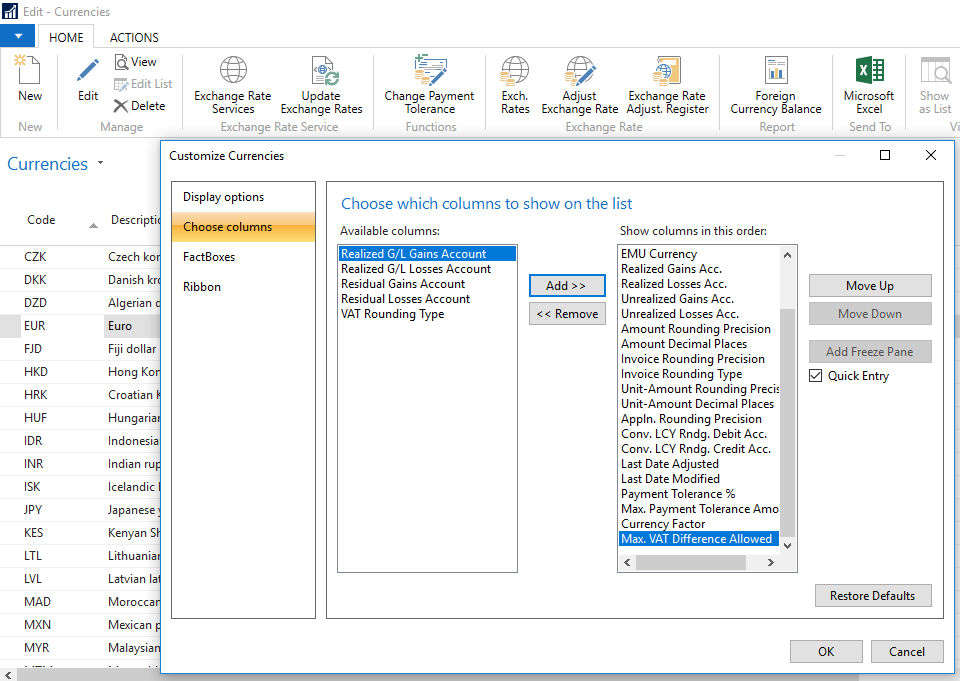
Step 5 (Optional): If you want to setup multiple currencies within the same company in your Dynamics NAV solution and would like to be able to adjust VAT amounts in different currencies. You will need to setup more than one area. To do this, you will need to go to the 'Currencies' page which you can access by going to 'Departments' then 'Financial Management' followed by 'Periodic Activities' then 'Currency' and choose 'Currencies' or like above you can manually search for 'Currencies'.
When you get to this page, you are looking for the 'Max VAT Difference Allowed' option. To be able to get to this hidden option you will need to add it to the page first. You can do this by right clicking on the page rows or columns then click on 'Choose Columns'. This will open up a dialogue window where you can add the required fields. Once you have done this you can then set the maximum VAT amount that users should be able to adjust which can be added to this field per each Currency appearing on the list.
If your business is finding it difficult to adjust VAT amounts in Dynamics NAV or is not sure how to use Dynamics NAV or needs some additional Dynamics NAV training then get in touch with our Dynamics NAV experts today to discuss your specific business requirements.
If you would like to receive more 'how to' guides similar to the one above, you can by signing up to our mailing list where they will be delivered straight to your inbox.
