Dave Whitham, our resident Dynamics NAV expert has been busy figuring out ways to make your life a little bit easier. Drawing from years of experience with Dynamics NAV, we’ll be featuring some of his best tips and tricks.
Sometimes I have customers that work at organisations that have multiple companies set up within their database. On occasion, my customers will have to move between companies more than once during the working day.
By using the Dynamics NAV menu, it’s roughly 5 mouse clicks to change companies (not that I have counted or anything!).
My tip for this week is letting you in on the secret that you can create customised desktop shortcuts to launch each company from desktop.
When I say desktop shortcuts, I really mean have something on your desktop that you can double click. If you have more than one company in your database, you can follow these simple steps to do it for each of them.
Tip: The shortcut can be created on any machine and re-used across multiple machines and/or users. Just make sure the parameters within the shortcut which determine the connection (server instance, port number, and company name) are correct.
1 .Right click on your desktop and select “New Shortcut.”
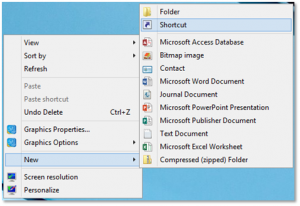
2. You’ll see the window below:
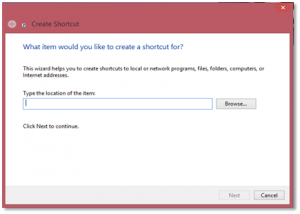
3. Enter the server address and make sure you use the following syntax: Application name://servername:portnumber/servicename/companyname/.
Any spaces that appear must be entered using the %20 entry.
Tip: This might sound a bit daunting. But most of the information you actually need can be found easily in NAV by choosing the “Select Server” option.
The Server Address field shows you the server name, port number, service name and available companies.
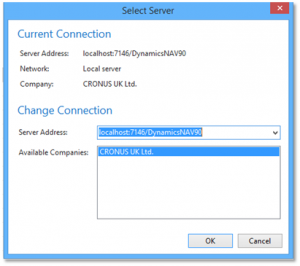
Here’s an example shortcut to open my Cronus company using the above syntax: dynamicsnav://localhost:7146/DynamicsNAV90/Cronus%20UK%20Ltd/
Tip: It’s important to remember that “localhost” will only work on the actual server where NAV is running – so if you are doing this on any machine that’s not the server, it shouldn’t say “localhost” but state the actual server name.
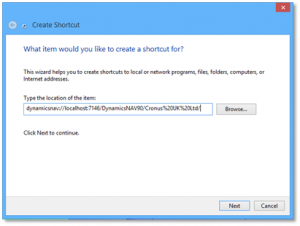
4. When the correct parameters have been entered, click Next.
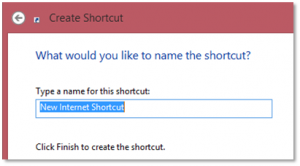
5. You’ll now be asked to name your shortcut. Once you’ve entered it, click Finish.
6. You should now have the custom shortcut on your desktop. It’ll automatically pick up the Dynamics NAV icon.

7. Finally, double click on the icon to use your new shortcut. You can follow this process as many times as you need to setup direct links to specific companies and database.
If there are any specific tips and tricks you’d like us to write about for Dynamics NAV, send a tweet to @ABSsolutions or email us at info@advantage.co.uk


